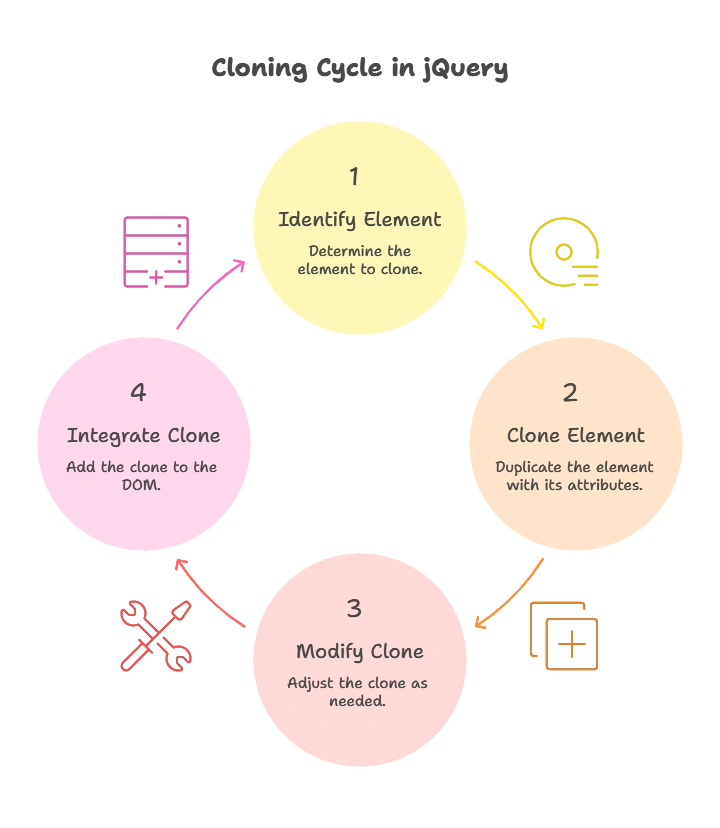
Cloning Elements in jQuery
Cloning elements is a powerful feature in jQuery that allows developers to create copies of DOM elements while preserving attributes, events, and their content. This feature is especially useful in dynamic web applications where you need to create multiple similar elements, such as repeating form fields or duplicating a section of the page.
Introduction to Cloning in jQuery
Cloning in jQuery allows you to duplicate a DOM element, along with its attributes and children. This can be useful when creating dynamic interfaces where the user interacts with multiple instances of the same element.
Example Use Cases:
- Duplicating form fields dynamically.
- Repeating sections of a webpage.
- Creating multiple elements with the same structure.

The Basic Syntax of .clone()
The .clone() method in jQuery is used to create a copy of selected elements, including their attributes and child elements. However, by default, cloned elements do not retain any associated events or data.
Basic Syntax:
$(selector).clone([withDataAndEvents])
selector: The element you want to clone.withDataAndEvents: A boolean flag that determines whether events and data should be copied (optional, default isfalse).
Cloning Without Events and Data
By default, the .clone() method only copies the HTML structure and attributes of the element, but not the events and data associated with it.
Example:
					<div id="originalDiv">
    <p>Hello, I am original!</p>
</div>
<button id="cloneBtn">Clone</button>
<script type="litespeed/javascript">$(document).ready(function(){$('#cloneBtn').click(function(){var clonedDiv=$('#originalDiv').clone();$('body').append(clonedDiv)})})</script>
Explanation:
- Code: This example clones the
<div>element and appends the clone to the body when the button is clicked. - Output: A new
<div>with the same content will be added to the page every time the “Clone” button is clicked. However, if there are any event handlers attached to the original element, they will not be copied to the clone.
Cloning With Events and Data
To clone elements along with their events and associated data, you need to pass true as an argument to the .clone() method.
Example:
					<div id="originalDiv">
    <p>Hello, I am original!</p>
</div>
<button id="cloneBtn">Clone</button>
<script type="litespeed/javascript">$(document).ready(function(){$('#originalDiv').on('click',function(){alert('Original div clicked!')});$('#cloneBtn').click(function(){var clonedDiv=$('#originalDiv').clone(!0);$('body').append(clonedDiv)})})</script>
Explanation:
- Code: The original
<div>has a click event attached to it. When cloning the element with.clone(true), the event handler is also copied to the cloned element. - Output: When you click the cloned
<div>, it will trigger the same event as the original, displaying an alert.
Advanced Cloning Techniques
Cloning Form Fields with Data
When cloning form elements, it’s important to consider that the form fields’ values are not copied by default. You may need to manually handle the form data after cloning.
Example:
					<form id="form1">
    <input type="text" name="username" value="John">
    <input type="email" name="email" value="john@example.com">
</form>
<button id="cloneFormBtn">Clone Form</button>
<script type="litespeed/javascript">$(document).ready(function(){$('#cloneFormBtn').click(function(){var clonedForm=$('#form1').clone(!0);clonedForm.find('input').each(function(){$(this).val($(this).val())});$('body').append(clonedForm)})})</script>
Explanation:
- Code: After cloning the form, we use
.each()to iterate over the cloned form’s input fields and manually copy the values. - Output: The cloned form will have the same values as the original form fields.
Working with Nested Elements
If you have a deeply nested DOM structure, .clone() will also clone all child elements, preserving the entire hierarchy.
Example:
					<div id="container">
    <div class="nested">
        <p>This is a nested paragraph.</p>
    </div>
</div>
<button id="cloneContainerBtn">Clone Container</button>
<script type="litespeed/javascript">$(document).ready(function(){$('#cloneContainerBtn').click(function(){var clonedContainer=$('#container').clone(!0);$('body').append(clonedContainer)})})</script>
Explanation:
- Code: This example shows how to clone a nested element. The entire
<div id="container">along with its nested<p>element is cloned. - Output: The nested structure will be copied to the DOM when the button is clicked.
Handling Events in Cloned Elements
When cloning elements, it’s crucial to manage events correctly. By default, cloned elements do not carry over events unless you explicitly ask for it.
Using .on() for Event Delegation
Instead of cloning events, you can use event delegation to automatically handle events on both the original and cloned elements. This technique is more efficient and scalable, especially when you deal with dynamically added elements.
Example:
					<div class="clickable">Click me!</div>
<button id="addDivBtn">Add More Divs</button>
<script type="litespeed/javascript">$(document).ready(function(){$('body').on('click','.clickable',function(){alert('Div clicked!')});$('#addDivBtn').click(function(){var newDiv=$('<div class="clickable">Click me!</div>');$('body').append(newDiv)})})</script>
Explanation:
- Code: Instead of attaching the click event directly to the original or cloned
.clickabledivs, the event is attached to the body and delegated to all current and future.clickableelements. - Output: Every time you add a new div, it will automatically have the click event handler without explicitly cloning the event.
Common Mistakes and How to Avoid Them
- Mistake: Forgetting to clone events and data when required.
- Solution: Use
.clone(true)if you need to clone events and data.
- Solution: Use
- Mistake: Not handling form field values during cloning.
- Solution: Manually copy values for form fields after cloning.
- Mistake: Overusing
.clone()without event delegation.- Solution: Use event delegation with
.on()for better performance, especially with dynamically added elements.
- Solution: Use event delegation with
Best Practices
- Use
.clone(true)When Necessary: Always passtrueto.clone()if you want to clone events and data. Otherwise, the new element will not behave the same as the original. - Manually Handle Form Fields: Cloning form elements requires extra care to ensure that values are preserved. Be sure to manually handle values when necessary.
- Leverage Event Delegation: Instead of cloning events, consider using event delegation with
.on()for better performance and to avoid unnecessary duplication of event listeners.
Cloning elements in jQuery is a versatile tool that can simplify many common tasks in dynamic web development. By understanding the basics of .clone() and how to handle events and data when cloning elements, you can build more flexible and interactive applications. Whether you're cloning form fields, duplicating content, or working with nested structures, the cloning feature provides an efficient way to create dynamic user interfaces. Happy Coding!❤️
