jQuery with Web Components
Web Components are a set of web platform APIs that allow you to create custom, reusable HTML elements. These components are encapsulated, which means they can have their own structure, style, and behavior, without affecting the rest of the application.
Key Features of Web Components
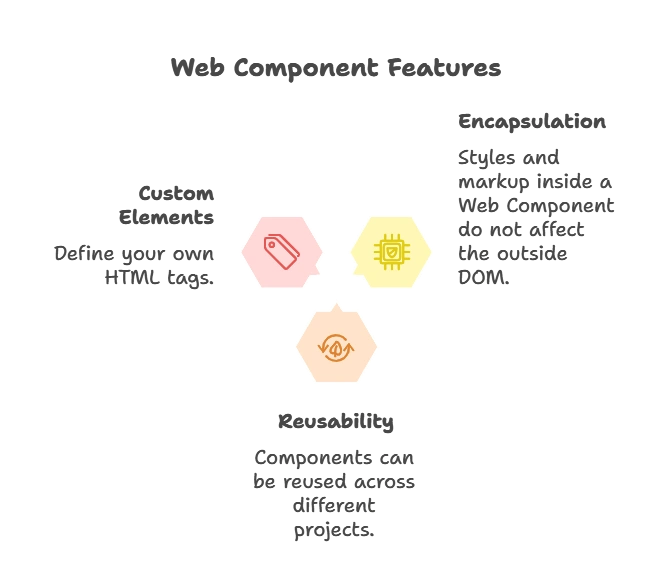
- Encapsulation: Styles and markup inside a Web Component do not affect the outside DOM.
- Reusability: Components can be reused across different projects.
- Custom Elements: Define your own HTML tags.

The Building Blocks of Web Components
Web Components consist of three main technologies:
- Custom Elements: Define new HTML tags with associated behaviors.
- Shadow DOM: Encapsulate the internal structure of the component to avoid conflicts with the main document.
- HTML Templates: Define reusable templates for your components.
Creating a Custom Element
Custom elements are the core of Web Components. They allow you to define new HTML tags.
Basic Custom Element
					class MyElement extends HTMLElement {
    constructor() {
        super();
        this.innerHTML = `<p>Hello, I am a custom element!</p>`;
    }
}

customElements.define('my-element', MyElement);
In this example:
- We create a new class
MyElementthat extendsHTMLElement. - The
constructorsets the inner HTML of the custom element. customElements.defineregisters the element, allowing us to use<my-element>in our HTML.
Using jQuery with Custom Elements:
<my-element></my-element> <script type="litespeed/javascript">$(document).ready(function(){$('my-element').on('click',function(){alert('Custom element clicked!')})})</script>
In this example, jQuery is used to interact with the custom element, adding an event listener for clicks.
Deep Dive: Shadow DOM and jQuery
The Shadow DOM provides encapsulation for the component’s DOM and styles. This means that styles applied within the shadow DOM won’t leak out and affect other parts of the page, and vice versa.
Creating a Shadow DOM
					class MyShadowElement extends HTMLElement {
    constructor() {
        super();
        const shadow = this.attachShadow({mode: 'open'});
        shadow.innerHTML = `<style>p { color: blue; }</style><p>This text is inside the shadow DOM!</p>
        `;
    }
}

customElements.define('my-shadow-element', MyShadowElement);
In this example:
- The
attachShadowmethod creates a shadow root for the component. - Styles and content are encapsulated within the shadow DOM.
jQuery and Shadow DOM
					$(document).ready(function() {
    const shadowEl = $('my-shadow-element').get(0).shadowRoot;
    $(shadowEl).find('p').css('color', 'red');
});
In this example:
- We access the shadow DOM using jQuery and modify the styles of elements within it.
HTML Templates: Defining Reusable Structures
HTML Templates allow you to define a reusable block of HTML that can be instantiated in your custom elements.
Creating an HTML Template
					<template id="my-template"><style>p { color: green; }</style><p>This is a reusable template!</p>
</template> <script type="litespeed/javascript">class MyTemplateElement extends HTMLElement{constructor(){super();const shadow=this.attachShadow({mode:'open'});const template=document.getElementById('my-template').content.cloneNode(!0);shadow.appendChild(template)}}
customElements.define('my-template-element',MyTemplateElement)</script>
In this example:
- We define a
<template>in the HTML, which includes both styles and content. - The custom element clones the content of the template and attaches it to the shadow DOM.
jQuery and Templates:
					$(document).ready(function() {
    $('my-template-element').each(function() {
        const shadowRoot = this.shadowRoot;
        $(shadowRoot).find('p').text('Modified by jQuery!');
    });
});
This example demonstrates how jQuery can interact with elements instantiated from a template.
Integrating Web Components with jQuery Plugins
Web Components can act as wrappers for jQuery plugins, allowing reusable functionality.
Example: Using a jQuery Slider in a Web Component
					<slider-component></slider-component> <script type="litespeed/javascript">class SliderComponent extends HTMLElement{connectedCallback(){this.innerHTML='<input type="range" id="slider">';$('#slider').slider()}}
customElements.define('slider-component',SliderComponent)</script>
Explanation:
- The component renders an input slider.
- The
slider()method from jQuery UI enhances the slider.
Handling Web Component Lifecycle Events
Lifecycle Events Overview
connectedCallback: When the element is added to the DOM.disconnectedCallback: When the element is removed from the DOM.attributeChangedCallback: When attributes are changed.
Example: jQuery and connectedCallback
					<hello-world></hello-world> <script type="litespeed/javascript">class HelloWorld extends HTMLElement{connectedCallback(){$(this).append('<p>Hello, World!</p>')}}
customElements.define('hello-world',HelloWorld)</script>
Explanation:
$(this).append(): Appends content to the custom element when it’s added to the DOM.
Advanced Techniques
Passing Data Between jQuery and Web Components
Use attributes or custom events to share data.
Example: Setting Attributes with jQuery
					<user-card></user-card> <script type="litespeed/javascript">class UserCard extends HTMLElement{connectedCallback(){const name=this.getAttribute('name');this.innerHTML=`<p>User: ${name}</p>`}}
customElements.define('user-card',UserCard);$(document).ready(function(){$('user-card').attr('name','Suryansh')})</script>
Example: Emitting Custom Events
					<custom-alert></custom-alert> <script type="litespeed/javascript">class CustomAlert extends HTMLElement{connectedCallback(){$(this).on('show-alert',function(event){alert(event.detail.message)})}}
customElements.define('custom-alert',CustomAlert);$(document).ready(function(){const alertElement=$('custom-alert')[0];$(alertElement).trigger('show-alert',{detail:{message:'Hello!'}})})</script>
Explanation:
- The
user-cardcomponent displays a user’s name and includes a nestedcustom-alertcomponent. - The
custom-alertlistens for ashow-alertevent using jQuery and displays an alert with a custom message. - jQuery triggers the
show-alertevent on thecustom-alert, passing a message (“Hello!”) as event data. - The
user-cardis dynamically assigned anameattribute (“Suryansh”) using jQuery, and the nested components interact seamlessly.
Using jQuery with Web Components can enhance productivity, especially in legacy projects where jQuery is already in use. By combining jQuery’s simplicity with the encapsulation and reusability of Web Components, you can build dynamic and modern web applications. This chapter provided a comprehensive overview, covering basics, lifecycle methods, Shadow DOM manipulation, and advanced integration techniques.You now have a solid foundation to implement jQuery with Web Components effectively!
