Creating Custom jQuery Plugins
Creating custom jQuery plugins is a powerful way to extend the functionality of jQuery by encapsulating reusable code. By creating plugins, you can write your own methods that can be called on jQuery objects, allowing for more modular, maintainable, and reusable code.
What is a jQuery Plugin?
A jQuery plugin is simply a function that extends the capabilities of jQuery objects. It allows developers to bundle up a set of custom functionalities in a reusable way that can be easily integrated into different projects. jQuery provides a built-in system to extend itself, making it easier to create these plugins.
For example, with a plugin, you can write a method like this:
$('element').customMethod();
Instead of rewriting the same code multiple times, the plugin provides a single, modular function.
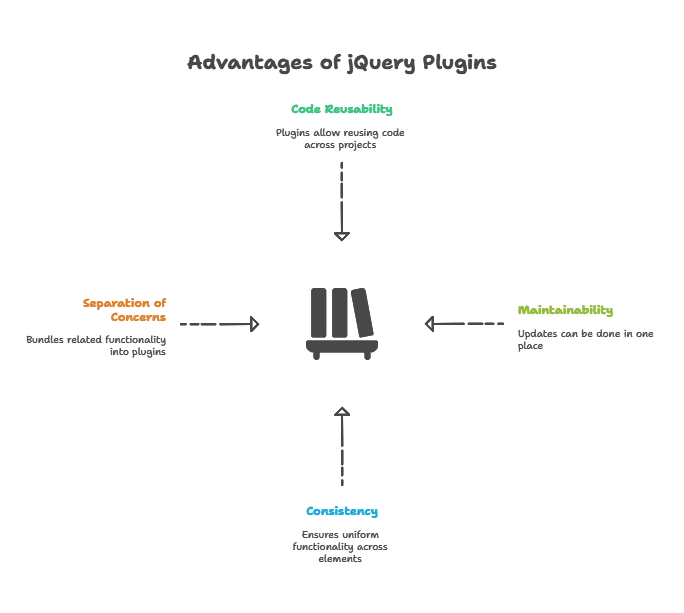
Advantages of Using jQuery Plugins
- Code Reusability: Plugins enable you to reuse code, making your work more modular and efficient.
- Maintainability: You can maintain and update the code in one place rather than modifying it in multiple locations.
- Consistency: Since the functionality is packaged into one method, it ensures consistency across all elements using the plugin.
- Separation of Concerns: By bundling related functionality into a plugin, you separate concerns, keeping your main codebase clean and organized.

Creating a Basic jQuery Plugin
To create a jQuery plugin, we define a function on jQuery’s $.fn object. This ensures that the plugin can be called on any jQuery object.
Example: A Basic jQuery Plugin
Let’s create a simple plugin called highlight that changes the background color of an element to yellow.
					(function($) {
    $.fn.highlight = function() {
        // 'this' refers to the jQuery object
        this.css('background-color', 'yellow');
        return this; // Return the jQuery object to allow chaining
    };
})(jQuery);
In the code above:
- We immediately invoke the function to avoid polluting the global scope.
- The plugin is defined using
$.fn, which attaches it to jQuery objects. thisrefers to the selected elements that the plugin is called on.
Usage:
					$(document).ready(function() {
    $('p').highlight();
});
Output: All <p> elements will have their background color set to yellow.
Enhancing the Plugin with Options
Most plugins need to be flexible. You can achieve this by allowing users to pass options. Let’s enhance the highlight plugin to accept a color as an option.
Example: Enhanced Plugin with Options
					(function($) {
    $.fn.highlight = function(options) {
        // Default settings
        var settings = $.extend({
            color: 'yellow'
        }, options);

        // Apply the color to the selected elements
        this.css('background-color', settings.color);

        return this; // Return the jQuery object to allow chaining
    };
})(jQuery);
Now, the plugin accepts an options parameter, allowing users to specify the color.
Usage:
					$(document).ready(function() {
    $('p').highlight({ color: 'lightblue' });
});
Output: The background color of all <p> elements will be set to light blue.
Best Practices for jQuery Plugins
- Chainability: Always return the
thisobject at the end of the plugin to enable method chaining. - Encapsulate Code: Wrap the plugin code in a function closure to avoid polluting the global namespace.
- Defaults and Options: Provide sensible default options and allow users to override them.
- Handle Edge Cases: Ensure that the plugin handles empty selections and other edge cases gracefully.
- Error Handling: Implement error handling to catch any issues within the plugin.
Advanced Plugin Techniques
Namespaced Events
Plugins often involve binding events to DOM elements. To avoid conflicts with other parts of the code, it’s good practice to namespace your events.
Example: Using Namespaced Events
					(function($) {
    $.fn.customEventPlugin = function() {
        this.on('click.myPluginNamespace', function() {
            alert('Element clicked!');
        });

        return this;
    };
})(jQuery);
Usage:
$('button').customEventPlugin();
In this example, the event is namespaced under myPluginNamespace, allowing easy removal later:
$('button').off('click.myPluginNamespace');
Using jQuery Plugin Methods
Sometimes, you may want your plugin to offer more than just one behavior. You can define multiple methods within the same plugin.
Example: Plugin with Multiple Methods
					(function($) {
    var methods = {
        init: function() {
            this.css('background-color', 'yellow');
        },
        reset: function() {
            this.css('background-color', '');
        }
    };

    $.fn.highlight = function(method) {
        if (methods[method]) {
            return methods[method].apply(this);
        } else {
            $.error('Method ' + method + ' does not exist on jQuery.highlight');
        }
    };
})(jQuery);
Usage:
					$('p').highlight('init'); // Highlight paragraphs
$('p').highlight('reset'); // Reset paragraphs to default state
Handling Multiple Elements
Plugins often need to handle multiple elements. jQuery provides utilities like each to loop over all selected elements.
Example: Handling Multiple Elements
					(function($) {
    $.fn.highlightMultiple = function(options) {
        var settings = $.extend({
            color: 'yellow'
        }, options);

        return this.each(function() {
            $(this).css('background-color', settings.color);
        });
    };
})(jQuery);
Usage:
$('div').highlightMultiple({ color: 'pink' });
Output: Each <div> will have its background color changed to pink.
Creating Chainable Plugins
To allow method chaining in plugins, always return the jQuery object (this). This ensures that you can chain multiple methods.
Example: Chainable Plugin
					(function($) {
    $.fn.highlightChain = function(options) {
        var settings = $.extend({
            color: 'yellow'
        }, options);

        // Return this for chainability
        return this.css('background-color', settings.color);
    };
})(jQuery);
Usage:
$('p').highlightChain().slideUp();
Output: All paragraphs will be highlighted and then slide up.
Creating custom jQuery plugins allows you to write reusable, maintainable code and extend the power of jQuery. Starting with simple plugins and gradually adding options, handling multiple elements, and ensuring chainability are key techniques for writing effective plugins. By following best practices and advanced techniques, you can create robust, flexible plugins that can be used in a variety of projects. Happy Coding!❤️
