Jamstack Architecture with React
Jamstack architecture is designed to improve the performance, security, and scalability of web applications. By decoupling the frontend and backend, Jamstack allows for a more modular approach to web development. React, a popular library for building user interfaces, fits seamlessly into the Jamstack architecture, making it possible to create highly interactive and performant websites.
Basics of Jamstack Architecture
What is Jamstack?
Definition: Jamstack is a modern web development architecture that focuses on pre-rendering static HTML and leveraging APIs for dynamic functionality.
Components:
- JavaScript: The programming language used for dynamic functionality on the client side.
- APIs: External services that handle server-side operations, such as data fetching or authentication.
- Markup: Pre-rendered static HTML files that are served to users.
Advantages:
- Performance: Fast load times due to static pre-rendering.
- Security: Reduced attack surface since the backend is decoupled from the frontend.
- Scalability: Easy to scale as static files can be served via CDNs.
How Does Jamstack Work?
Workflow:
- Pre-rendering: The frontend is built into static HTML during the build process.
- Client-Side JavaScript: Handles dynamic interactions and updates on the client side.
- APIs: Handle server-side logic and data management.
Example: A blog site where posts are pre-rendered as static HTML, and user interactions like commenting are handled through third-party APIs.
Setting Up a Jamstack Project with React
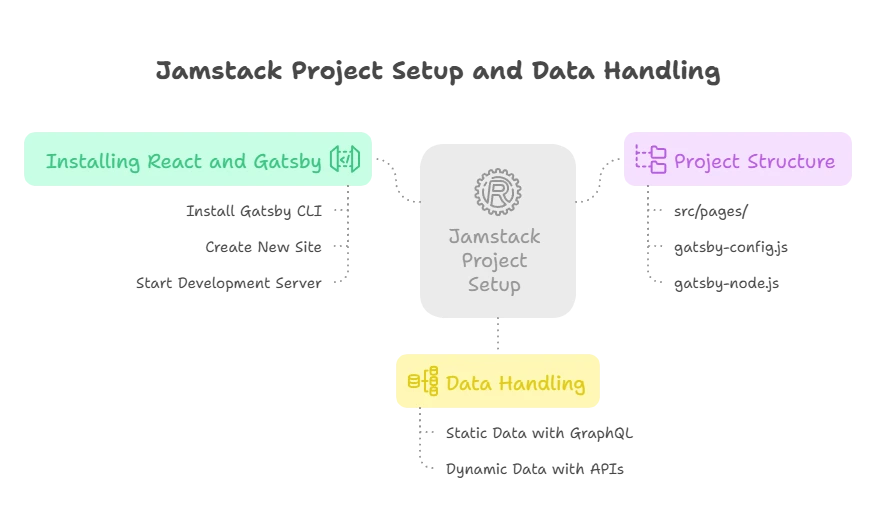
Installing React and Gatsby
Gatsby is a popular static site generator that works well with React.
Steps:
1.Install Gatsby CLI:
npm install -g gatsby-cli
2 Create a new Gatsby site:
gatsby new my-jamstack-site
3 Navigate to the project directory:
cd my-jamstack-site
4.Start the development server:
gatsby develop
Explanation: Gatsby combines React with static site generation, making it a great fit for Jamstack architecture.
Understanding the Project Structure
Key Files and Directories:
src/pages/: Contains React components that represent pages of your site.gatsby-config.js: Configuration file where you can add plugins and site metadata.gatsby-node.js: Contains Node.js APIs for creating pages and handling data.
Example:
src/pages/index.js:
					import React from 'react';

const IndexPage = () => (
  <div>
    <h1>Welcome to My Jamstack Site</h1>
  </div>
);

export default IndexPage;
Explanation: This simple React component represents the homepage of your Jamstack site.

Working with Data in Jamstack
Static Data with GraphQL
Gatsby uses GraphQL to query data during the build process.
Example:
Create a new page src/pages/about.js
					import React from 'react';
import { graphql } from 'gatsby';

const AboutPage = ({ data }) => (
  <div>
    <h1>{data.site.siteMetadata.title}</h1>
    <p>About us page content.</p>
  </div>
);

export const query = graphql`
  query {
    site {
      siteMetadata {
        title
      }
    }
  }
`;

export default AboutPage;
Explanation: This page queries site metadata using GraphQL and renders it on the About page.
Dynamic Data with APIs
You can fetch dynamic data from external APIs.
Example:
Create a new page src/pages/users.js:
					import React, { useState, useEffect } from 'react';

const UsersPage = () => {
  const [users, setUsers] = useState([]);

  useEffect(() => {
    fetch('https://api.example.com/users')
      .then(response => response.json())
      .then(data => setUsers(data));
  }, []);

  return (
    <div>
      <h1>Users</h1>
      <ul>
        {users.map(user => (
          <li key={user.id}>{user.name}</li>
        ))}
      </ul>
    </div>
  );
};

export default UsersPage;
Explanation: This component fetches user data from an API and displays it.
Advanced Jamstack Features with React
Creating Dynamic Pages
Use Gatsby’s Node APIs to create pages dynamically based on data.
Example:
Create gatsby-node.js:
					const path = require('path');

exports.createPages = async ({ graphql, actions }) => {
  const { createPage } = actions;

  const result = await graphql(`
    query {
      allMarkdownRemark {
        edges {
          node {
            frontmatter {
              path
            }
          }
        }
      }
    }
  `);

  result.data.allMarkdownRemark.edges.forEach(({ node }) => {
    createPage({
      path: node.frontmatter.path,
      component: path.resolve(`./src/templates/blog-post.js`),
      context: {
        pathSlug: node.frontmatter.path,
      },
    });
  });
};
Explanation: This example generates pages for each blog post using markdown files and creates dynamic routes.
Adding Server-Side Logic
Use serverless functions for backend functionality.
Example:
Create a serverless function src/api/hello.js:
					export default function handler(req, res) {
  res.status(200).json({ message: 'Hello from the server!' });
}
Explanation: This serverless function can be deployed and accessed as an API endpoint, handling server-side logic like form submissions or data processing.
Handling Authentication
Integrate authentication services into your Jamstack site.
Example:
Use a service like Auth0 to handle authentication.
Steps:
- Set up Auth0 for authentication.
- Use Auth0’s JavaScript SDK to manage authentication on the client side.
Code Example:
					import React, { useEffect } from 'react';
import { useAuth0 } from '@auth0/auth0-react';

const LoginButton = () => {
  const { loginWithRedirect, logout, isAuthenticated } = useAuth0();

  return isAuthenticated ? (
    <button onClick={() => logout({ returnTo: window.location.origin })}>
      Log Out
    </button>
  ) : (
    <button onClick={() => loginWithRedirect()}>Log In</button>
  );
};

export default LoginButton;
Explanation: This component provides login and logout buttons using Auth0, demonstrating client-side authentication in a Jamstack site.
Deploying a Jamstack Site
Using Netlify
Description: Netlify is a popular platform for deploying static sites with features like continuous deployment and serverless functions.
Steps:
- Push your site to a Git repository.
- Sign up for Netlify and link your repository.
- Configure build settings and deploy.
Explanation: Netlify automates the build and deployment process, making it easy to deploy and manage your Jamstack site.
Using Vercel
Description: Vercel is another popular platform for deploying Jamstack sites with features for serverless functions and automated builds.
Steps:
- Push your site to a Git repository.
- Sign up for Vercel and import your project.
- Configure build settings and deploy.
Explanation: Vercel provides a similar deployment experience to Netlify, with additional features for optimizing and managing your site.
Jamstack architecture, combined with React, offers a powerful approach to building modern web applications. By leveraging static site generation, client-side JavaScript, and external APIs, you can create fast, secure, and scalable sites. Gatsby, as a React-based static site generator, fits seamlessly into this architecture, providing tools and features to optimize your development workflow. Happy coding !❤️
