Working with File Uploads in Node.js
File uploads are an essential feature in many web applications, whether for user profile images, documents, or other files.
Introduction to File Uploads in Node.js
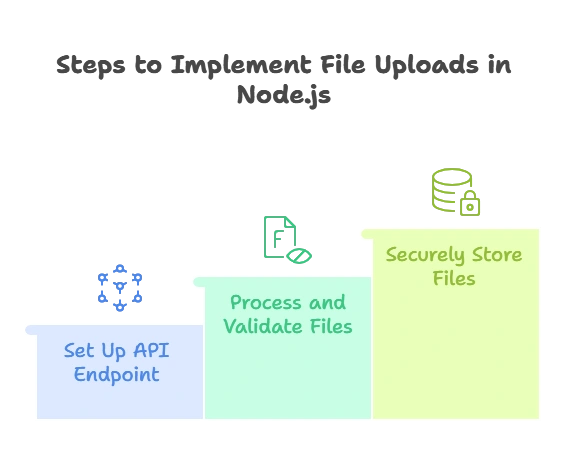
In Node.js, file handling and uploads are commonly achieved using the Express framework along with specialized middleware, such as Multer, which simplifies handling multipart/form-data, the encoding type used for file uploads. Working with file uploads involves setting up an API endpoint to accept files, processing and validating those files, and then storing them securely.

Setting Up a File Upload API
Basic Setup with Express
To handle file uploads, we start by creating a basic Express server and installing Multer, a middleware that parses form-data requests.
1. Install Express and Multer:
npm install express multer
2. Setup Express Application:
					const express = require('express');
const app = express();
const PORT = 3000;

app.listen(PORT, () => {
  console.log(`Server is running on port ${PORT}`);
});
Installing Middleware for File Uploads
We need to configure Multer as middleware to handle incoming file data.
Example: Basic Multer Setup
					const multer = require('multer');
const upload = multer({ dest: 'uploads/' }); // 'dest' specifies the folder to store uploaded files
In this example, Multer saves uploaded files to the uploads directory, which we will create in our project’s root folder.
Handling Single File Uploads
Writing the Upload Route
To upload a single file, we create a route in Express where Multer will process the request.
Example: Single File Upload Route
					app.post('/upload', upload.single('file'), (req, res) => {
  if (req.file) {
    res.send(`File uploaded successfully: ${req.file.filename}`);
  } else {
    res.status(400).send("No file uploaded.");
  }
});
Explanation:
- The
upload.single('file')middleware processes the incoming file with the namefilein the form data. req.fileholds metadata about the uploaded file (e.g., filename, path).
Processing and Saving Files
By default, files are saved to the destination directory defined in Multer, but you can customize this storage location.
Output: On successfully uploading a file, the response will display:File uploaded successfully: <generated filename>
Handling Multiple File Uploads
Modifying the Route for Multiple Files
To handle multiple file uploads, we modify the upload middleware to accept an array of files.
Example: Multiple File Upload Route
					app.post('/upload-multiple', upload.array('files', 5), (req, res) => {
  if (req.files) {
    res.send(`Uploaded ${req.files.length} files successfully.`);
  } else {
    res.status(400).send("No files uploaded.");
  }
});
Explanation:
upload.array('files', 5)accepts up to 5 files with the form field namefiles.req.filescontains an array of file objects, each with its metadata.
File Validation and Security
Validating File Types and Sizes
File validation is critical to avoid handling unwanted or malicious files. With Multer, you can specify file type and size limits.
Example: File Validation with Multer
					const fileFilter = (req, file, cb) => {
  // Accept only images
  if (file.mimetype.startsWith('image/')) {
    cb(null, true);
  } else {
    cb(new Error('Only images are allowed!'), false);
  }
};

const uploadWithValidation = multer({
  dest: 'uploads/',
  fileFilter: fileFilter,
  limits: { fileSize: 1024 * 1024 } // 1MB limit
});
In this setup:
- Only files with a MIME type starting with
image/(e.g.,image/png,image/jpeg) are accepted. - Files larger than 1MB are rejected.
Protecting Against Malicious Files
- Check File Extensions: Validate the extension of each uploaded file.
- Sanitize File Names: Prevent users from uploading files with malicious names by renaming files on upload.
Advanced File Upload Configurations
Using Cloud Storage (AWS S3, Google Cloud Storage)
Offloading files to cloud storage allows scalable storage solutions. Using AWS S3 as an example, we configure Multer to store files directly in S3.
1. Install AWS SDK and Multer S3 Storage:
npm install aws-sdk multer-s3
2. AWS S3 Configuration:
					const AWS = require('aws-sdk');
const multerS3 = require('multer-s3');

AWS.config.update({ region: 'us-east-1' });

const s3 = new AWS.S3();
const uploadS3 = multer({
  storage: multerS3({
    s3: s3,
    bucket: 'my-bucket',
    key: function (req, file, cb) {
      cb(null, Date.now().toString() + '-' + file.originalname);
    }
  })
});
Streaming Large Files
For large files, you may use streams to process data as it’s uploaded rather than waiting until the entire file is received.
Example Project: Profile Picture Upload
Setting Up
- Create Routes for uploading and retrieving profile pictures.
- Store File Paths in the database rather than the actual images to reduce storage space in the application.
Implementing the Full Workflow
- Upload Route saves the profile picture.
- Get Profile Picture Route fetches the picture from storage.
Code Example:
					// Upload Profile Picture
app.post('/profile-picture', upload.single('picture'), (req, res) => {
  if (req.file) {
    // Save file info to database (pseudo-code)
    saveProfilePicture(req.user.id, req.file.path);
    res.send("Profile picture uploaded successfully!");
  } else {
    res.status(400).send("No picture uploaded.");
  }
});

// Get Profile Picture
app.get('/profile-picture/:userId', (req, res) => {
  const picturePath = getProfilePicture(req.params.userId);
  res.sendFile(picturePath);
});
Handling file uploads in Node.js is a common requirement and can be effectively managed with Express and Multer. In this chapter, we explored various scenarios, from single and multiple file uploads to cloud storage. Happy Coding!❤️
