Containerization with Docker and Node.js
Containerization is a powerful method for developing, testing, and deploying applications in a portable and consistent environment. In this chapter, we’ll delve into using Docker to containerize a Node.js application, covering everything from the basics of Docker to advanced container management strategies.
Introduction to Docker and Containerization
Docker is a tool that allows applications to run in isolated environments called containers. Unlike virtual machines, containers share the host system’s kernel but have their libraries, dependencies, and runtime, making them lightweight and fast.
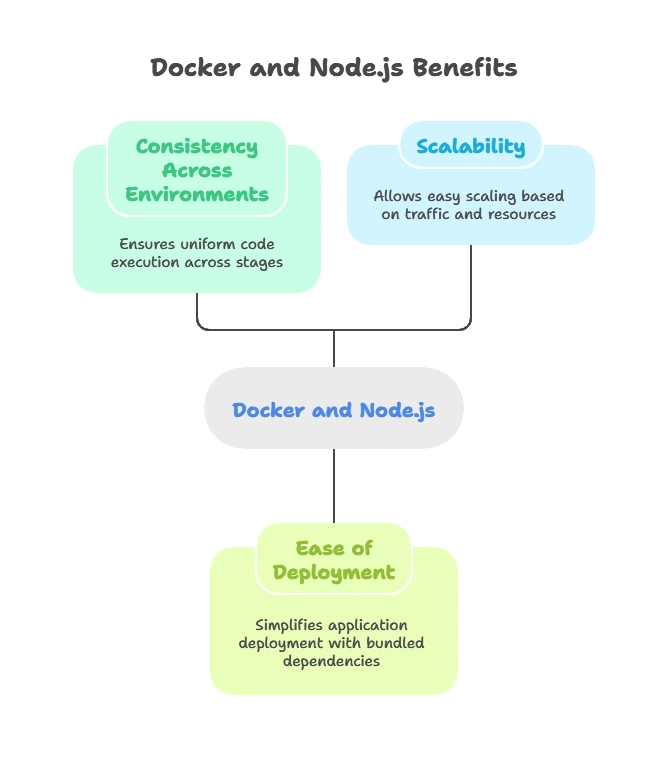
Benefits of Using Docker with Node.js
- Consistency Across Environments: Ensures that code runs the same way in development, testing, and production.
- Ease of Deployment: Containers bundle all dependencies, simplifying deployment.
- Scalability: Containers can be easily scaled up or down depending on traffic and resources.

Setting Up Docker
To start containerizing Node.js applications, you need to install Docker.
Install Docker: Download and install Docker from https://www.docker.com/get-started.
Verify Installation: Run the following command to check if Docker is installed correctly:
docker --version
Output: This should return the installed version of Docker, confirming that it’s set up correctly.
Creating Your First Dockerized Node.js Application
Step 1: Set Up a Basic Node.js Application
Create a directory for the Node.js app and add a basic app.js file:
					// app.js
const http = require('http');

const server = http.createServer((req, res) => {
  res.writeHead(200, { 'Content-Type': 'text/plain' });
  res.end('Hello from Dockerized Node.js!');
});

server.listen(3000, () => {
  console.log('Server running on port 3000');
});
Step 2: Add a package.json File
Run the following command to initialize a package.json file:
npm init -y
This command generates a package.json with default settings, including your dependencies.
Understanding Dockerfiles and Best Practices
A Dockerfile is a script with instructions for building a Docker image. It defines the environment, dependencies, and setup commands.
Basic Dockerfile for Node.js
Create a Dockerfile in the project root directory with the following content:
					# Use an official Node.js runtime as the base image
FROM node:14

# Create and set the working directory
WORKDIR /usr/src/app

# Copy package.json and install dependencies
COPY package*.json ./
RUN npm install

# Copy the rest of the application code
COPY . .

# Expose the application port
EXPOSE 3000

# Start the application
CMD ["node", "app.js"]
Explaination
- FROM node:14: Sets the base image as the official Node.js image.
- WORKDIR: Creates and sets the working directory.
- COPY package.json ./* and RUN npm install: Installs dependencies.
- COPY . .: Copies application files into the container.
- EXPOSE 3000: Exposes the port.
- CMD: Defines the command to run the application.
Building and Running Docker Containers
Build the Docker Image
Run the following command to build an image from the Dockerfile:
docker build -t my-node-app .
Output: Docker compiles the instructions in the Dockerfile, creating an image called my-node-app.
Step 2: Run the Docker Container
Use the docker run command to start the container:
docker run -p 3000:3000 my-node-app
Explanation: The -p flag maps the container’s port (3000) to your machine’s port (3000).
Output: The application runs in a container, accessible at http://localhost:3000.
Networking in Docker
Docker networking allows containers to communicate. The default bridge network isolates containers, while custom networks facilitate inter-container communication.
Creating a Custom Network
docker network create my-network
Running Containers on the Custom Network
docker run --network my-network --name app-container my-node-app
This setup allows containers within the same network to communicate by name.
Docker Compose for Multi-Container Applications
Docker Compose is a tool for defining and running multi-container applications. It uses a docker-compose.yml file to configure your application’s services.
Example docker-compose.yml
					version: '3'
services:
  app:
    build: .
    ports:
      - "3000:3000"
    networks:
      - app-network
  redis:
    image: "redis:alpine"
    networks:
      - app-network

networks:
  app-network:
    driver: bridge
Explanation: This configuration sets up the Node.js app and a Redis container, both in the same network for inter-service communication.
Running Docker Compose
docker-compose up
Output: Docker Compose builds and runs both the app and Redis containers, simplifying multi-container setups.
Optimizing Docker Images for Node.js
To make images smaller and faster, consider the following optimizations:
1. Use a Smaller Base Image:
FROM node:14-alpine
2. Leverage Caching by Ordering Commands: Place frequently changing commands, such as COPY . ., at the end.
3. Remove Unnecessary Files: Add .dockerignore to exclude files like node_modules and logs.
Volume Management and Data Persistence
Docker volumes store data independently of the container lifecycle, ensuring persistence even when containers are removed.
Creating a Volume
docker volume create app-data
Using the Volume in docker-compose.yml
					volumes:
  app-data:
services:
  app:
    volumes:
      - app-data:/usr/src/app/data
Scaling and Orchestrating Containers
As applications grow, tools like Docker Swarm and Kubernetes help manage, scale, and orchestrate containers.
Docker Swarm for Scaling
					docker swarm init
docker service create --name my-app --replicas 3 -p 3000:3000 my-node-app
Explanation: This command creates a Swarm service with three replicas of the Node.js application, allowing automatic load balancing.
Best Practices for Node.js in Docker
- Set Up Health Checks: Define health checks in the Dockerfile or Compose file to monitor container health.
- Avoid
latestTags: Use specific versions for consistency. - Use Non-Root User: Avoid running the container as root for security.
- Implement Logging: Use tools like Loggly or ELK stack for logging.
Docker's flexibility and capabilities allow for rapid development cycles and make the deployment process smooth and predictable. Containerization has become a foundational skill for modern web applications, and mastering it with Node.js opens up powerful possibilities in terms of application resilience, scalability, and performance. Happy Coding!❤️
