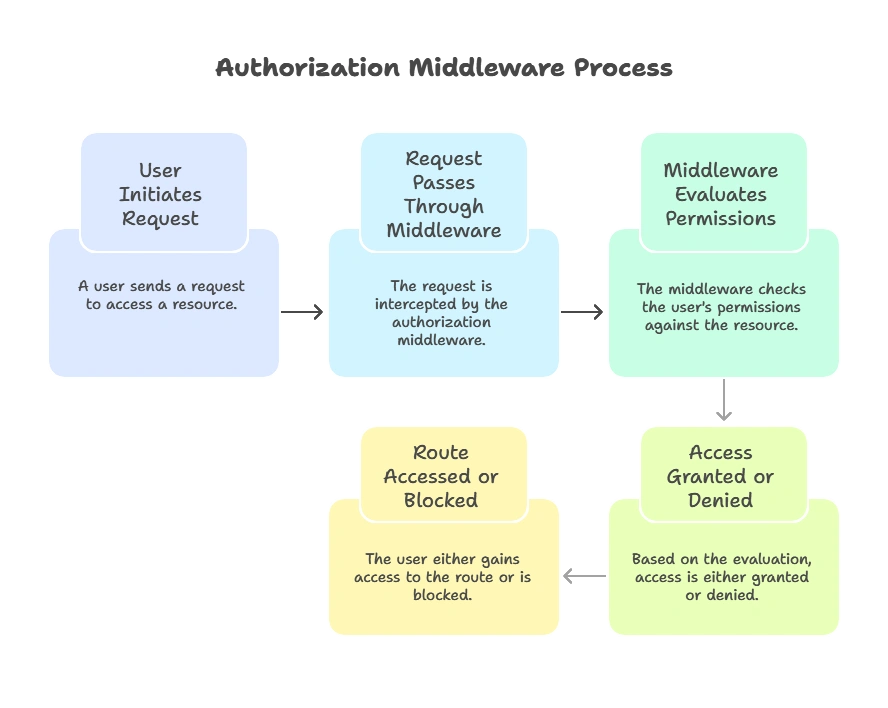
Authorization Middleware
In secure web applications, authorization is crucial for determining which users can access specific resources or perform certain actions. By using authorization middleware, we can enforce these restrictions within our Node.js applications to ensure that only authenticated users with proper permissions are allowed access.
Introduction to Authorization Middleware
Authorization is the process of granting or denying access to a particular resource based on the user’s permissions. In Node.js applications, authorization middleware helps define these rules, often based on roles or attributes, before users can access routes or perform actions.
Authorization middleware is typically placed before protected routes, ensuring requests are evaluated for appropriate permissions before proceeding.

Understanding Authentication vs. Authorization
- Authentication: Verifies the user’s identity (who they are) through mechanisms like passwords or tokens.
- Authorization: Grants specific permissions based on the user’s role or attributes after they’ve been authenticated.
An example: If Alice logs in (authentication), she might have access to basic resources. But if she’s a manager, she can access advanced resources (authorization).
Setting Up Authorization Middleware in Node.js
For a basic setup, create a middleware function that checks a user’s role and grants or denies access based on that role.
Code Example: Basic Authorization Middleware
File: authorizationMiddleware.js
					function authorize(allowedRoles) {
    return (req, res, next) => {
        const user = req.user; // Assuming user data is attached to req by authentication middleware
        if (!user) {
            return res.status(401).json({ message: "Unauthorized: User not logged in" });
        }
        if (!allowedRoles.includes(user.role)) {
            return res.status(403).json({ message: "Forbidden: Insufficient permissions" });
        }
        next(); // User has required role, allow access
    };
}

module.exports = authorize;
Explanation:
authorizeaccepts an array ofallowedRoles.- It checks if the
req.userrole matches any role inallowedRoles. - If no match is found, a
403 Forbiddenstatus is returned.
Usage Example in Express
File: app.js
					const express = require('express');
const app = express();
const authorize = require('./authorizationMiddleware');

// Dummy user data middleware for testing
app.use((req, res, next) => {
    req.user = { id: 1, name: 'Alice', role: 'admin' }; // Simulate an authenticated user
    next();
});

app.get('/admin', authorize(['admin']), (req, res) => {
    res.send('Welcome, admin!');
});

app.get('/user', authorize(['user', 'admin']), (req, res) => {
    res.send('Welcome, user!');
});

app.listen(3000, () => console.log('Server running on port 3000'));
Explanation:
- The
authorizemiddleware is applied to the/adminand/userroutes. - Only users with the
adminrole can access/admin, while bothuserandadminroles can access/user.
Output:
- If
req.user.roleisadmin, both routes are accessible. - If
req.user.roleisuser, only/useris accessible.
Implementing Role-Based Authorization (RBAC)
Role-Based Access Control (RBAC) assigns roles to users, and each role has specific permissions. This is one of the simplest and most common methods of authorization.
Example: Role-Based Access Control
File: authorizationMiddleware.js
					const rolesPermissions = {
    admin: ['read', 'write', 'delete'],
    user: ['read'],
};

function authorize(role, action) {
    return (req, res, next) => {
        const user = req.user;
        const permissions = rolesPermissions[user.role] || [];
        if (permissions.includes(action)) {
            return next();
        } else {
            return res.status(403).json({ message: "Forbidden: Action not allowed" });
        }
    };
}
Explanation:
rolesPermissionsmaps roles to their allowed actions.- The middleware checks if the user’s role includes the required action permission.
Usage Example
					app.get('/delete', authorize('admin', 'delete'), (req, res) => {
    res.send('Resource deleted by admin');
});
Output:
- Only users with
adminrole can delete resources; otherwise, a403error is shown.
Implementing Attribute-Based Authorization (ABAC)
Attribute-Based Access Control (ABAC) authorizes based on attributes, such as resource ownership or user attributes.
Example: Attribute-Based Authorization
					function authorizeResourceOwnership() {
    return (req, res, next) => {
        const user = req.user;
        const { ownerId } = req.body;
        if (user.id !== ownerId) {
            return res.status(403).json({ message: "Forbidden: User does not own resource" });
        }
        next();
    };
}
Explanation:
- Checks if
user.idmatches theownerIdattribute in the request, allowing access only if the user is the resource owner.
Combining Authorization with Authentication Middleware
Using both authentication and authorization middleware ensures that only authenticated users with specific roles or permissions are granted access.
					const authenticate = require('./authenticationMiddleware');
const authorize = require('./authorizationMiddleware');

app.use(authenticate);
app.get('/secure', authorize(['admin']), (req, res) => {
    res.send("Only authenticated admins can see this!");
});
Advanced Authorization Strategies
OAuth and JSON Web Tokens (JWT)
Using tokens, like JWTs, provides stateless authorization, which scales well for large applications.
Example: JWT Authorization Middleware
					const jwt = require('jsonwebtoken');

function authorizeJWT(req, res, next) {
    const token = req.headers['authorization'];
    if (!token) return res.status(401).send('Access Denied');
    jwt.verify(token, 'secretkey', (err, user) => {
        if (err) return res.status(403).send('Invalid Token');
        req.user = user;
        next();
    });
}
Testing Authorization Middleware
Testing authorization is crucial to ensure only authorized users access resources.
					const request = require('supertest');
const app = require('./app');

describe('Authorization Middleware', () => {
    test('Admin should access admin route', async () => {
        const response = await request(app).get('/admin').set('user', { role: 'admin' });
        expect(response.status).toBe(200);
    });

    test('User should not access admin route', async () => {
        const response = await request(app).get('/admin').set('user', { role: 'user' });
        expect(response.status).toBe(403);
    });
});
Authorization is an essential component of secure applications, ensuring users have permission to access specific resources. This chapter provided a comprehensive look at implementing authorization middleware in Node.js, from basic role-based controls to advanced JWT-based authorization. By understanding and applying these techniques, developers can build secure applications that restrict access effectively and efficiently. Happy Coding!❤️
