Building a Real-Time Chat Application with React
In this chapter, we will create a real-time chat application using React. This project will introduce you to both React basics and real-time communication concepts. By the end, you'll have a functional chat app and a solid understanding of integrating React with real-time technologies.
Prerequisites
Before diving in, ensure you have a basic understanding of:
- JavaScript: Knowledge of ES6+ features.
- React: Familiarity with components, state, and props.
- Node.js and npm: For setting up the backend and installing packages.
- Basic CSS: To style the application.
Setting Up the Project
To start, we need to set up both the frontend and backend environments.
Setting Up the Frontend
1.Create a React App: Open your terminal and run:
					npx create-react-app real-time-chat
cd real-time-chat
2.Install Socket.IO Client:
npm install socket.io-client
Setting Up the Backend
Initialize a Node.js Project: Create a new directory for the backend and initialize it:
					mkdir server
cd server
npm init -y
Install Dependencies
npm install express socket.io
Create a Basic Server: Create a file named server.js in the server directory:
					const express = require('express');
const http = require('http');
const socketIo = require('socket.io');

const app = express();
const server = http.createServer(app);
const io = socketIo(server);

io.on('connection', (socket) => {
    console.log('New client connected');

    socket.on('message', (message) => {
        io.emit('message', message);
    });

    socket.on('disconnect', () => {
        console.log('Client disconnected');
    });
});

server.listen(4000, () => {
    console.log('Server listening on port 4000');
});
Basic React Application Structure
Let’s build a simple React app structure for our chat application.
Basic Components
- App Component: In
src/App.js, we’ll set up our main component
					import React, { useState, useEffect } from 'react';
import io from 'socket.io-client';

const socket = io('http://localhost:4000');

function App() {
    const [message, setMessage] = useState('');
    const [messages, setMessages] = useState([]);

    useEffect(() => {
        socket.on('message', (message) => {
            setMessages((messages) => [...messages, message]);
        });
    }, []);

    const sendMessage = () => {
        socket.emit('message', message);
        setMessage('');
    };

    return (
        <div>
            <h1>Real-Time Chat</h1>
            <div>
                {messages.map((msg, index) => (
                    <div key={index}>{msg}</div>
                ))}
            </div>
            <input
                value={message}
                onChange={(e) => setMessage(e.target.value)}
                onKeyPress={(e) => {
                    if (e.key === 'Enter') {
                        sendMessage();
                    }
                }}
            />
            <button onClick={sendMessage}>Send</button>
        </div>
    );
}

export default App;
Explanation of Code:
- Import Statements: Import React,
useState,useEffect, andsocket.io-client. - Socket Initialization:
const socket = io('http://localhost:4000');connects to the backend server. - State Management: Use React’s
useStateto managemessageandmessages. - Effect Hook:
useEffectlistens for incoming messages and updates the state. - Send Message Function: Emits a message to the server and clears the input field.
- Rendering: Displays messages and provides an input field and button to send messages.
Output: The app should display a list of messages and allow users to send new messages in real-time.
Creating a Simple Chat Interface
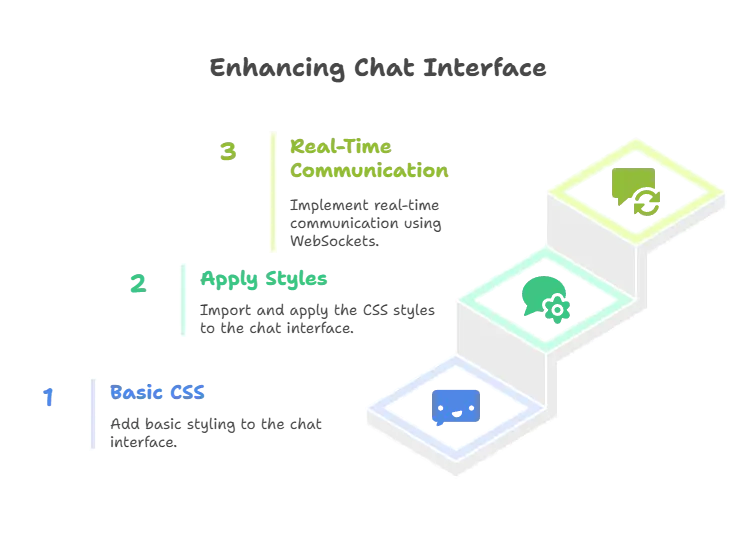
To improve the user experience, let’s add some styling and improve the UI.
Basic CSS
In src/App.css, add:
					div {
    margin: 20px;
    padding: 10px;
    border: 1px solid #ddd;
}

input {
    margin-right: 10px;
}
Applying Styles
Import the CSS file in src/App.js:
import './App.css';
Introduction to Real-Time Communication
Real-time communication allows users to see updates instantly without refreshing the page. This is typically achieved using WebSockets or similar technologies.
WebSockets
WebSockets provide full-duplex communication channels over a single TCP connection. In our case, we use Socket.IO, which simplifies WebSocket handling and adds features like automatic reconnections.
Integrating Socket.IO for Real-Time Functionality
Socket.IO is a popular library for real-time communication. We’ve already set up Socket.IO on both the client and server sides.
Client-Side Socket.IO
We initialized Socket.IO in src/App.js with:
const socket = io('http://localhost:4000');
Server-Side Socket.IO
In server.js, we created an instance of Socket.IO and set up event listeners for connection, message, and disconnect.

We handle real-time messages by emitting events and listening for them.
Emitting Messages
On the client side, we emit messages using:
socket.emit('message', message);
Listening for Messages
On the client side, we listen for incoming messages with:
Implementing User Authentication
For a more advanced chat application, you might want to implement user authentication.
Basic Authentication Flow
- Frontend Authentication: You can use libraries like
firebaseorAuth0to handle user authentication in React. - Backend Authentication: Implement token-based authentication (e.g., JWT) to secure your server endpoints.
Styling the Chat Application
To make our chat application visually appealing, you can use CSS frameworks like Bootstrap or Material-UI.
Using Bootstrap
1.Install Bootstrap:
npm install bootstrap
Import Bootstrap CSS: In src/index.js:
import 'bootstrap/dist/css/bootstrap.min.css';
Apply Bootstrap Classes: Modify your components to use Bootstrap classes for improved styling.
Advanced Features and Optimizations
Chat Rooms
To implement chat rooms or channels, you need to handle namespaces or rooms in Socket.IO.
1.Backend Code for Rooms:
					socket.on('joinRoom', (room) => {
    socket.join(room);
    socket.to(room).emit('message', `User joined room ${room}`);
});

socket.on('message', (message, room) => {
    socket.to(room).emit('message', message);
});
Frontend Code for Rooms: Update App.js to join rooms and send messages to specific rooms.
Optimizing Performance
- Debouncing Input: Prevent sending messages too frequently.
- Efficient Rendering: Use React’s
memoanduseCallbackhooks to optimize rendering performance.
Testing and Deployment
Testing
- Frontend Testing: Use libraries like Jest and React Testing Library to test React components.
- Backend Testing: Use Mocha or Jest for server-side testing.
Deployment
- Frontend Deployment: Deploy your React app to platforms like Vercel or Netlify.
- Backend Deployment: Deploy your server to platforms like Heroku or AWS.
In this chapter, we built a real-time chat application using React and Socket.IO. We covered the setup, basic implementation, and advanced features, including real-time communication, user Happy coding !❤️
