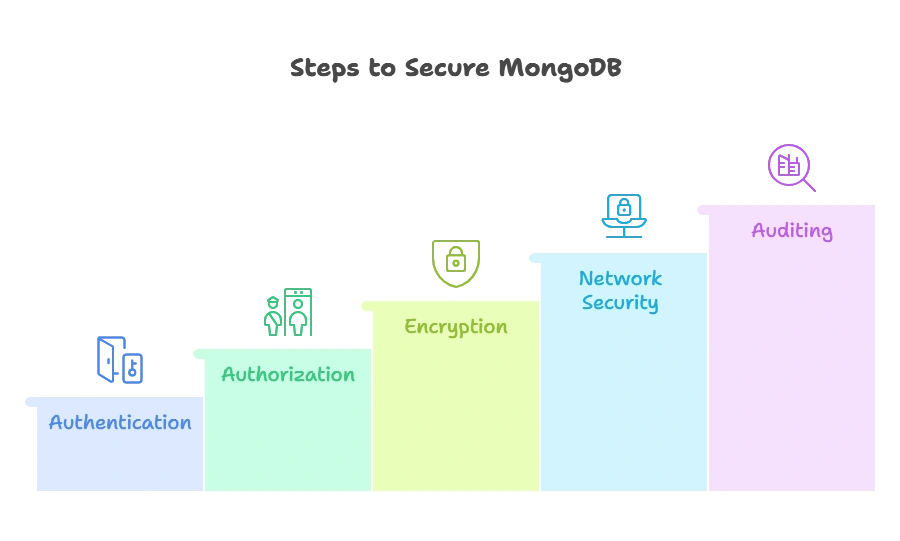
Security in MongoDB
Security is a critical aspect of managing any database system, and MongoDB is no exception. Proper security measures ensure that your data is protected from unauthorized access, modification, or deletion. This chapter will provide a comprehensive guide to MongoDB security, covering everything from basic concepts to advanced configurations with practical examples.
Basic Concepts of MongoDB Security
Authentication
Authentication is the process of verifying the identity of a user or service. MongoDB supports several authentication methods, including SCRAM (Salted Challenge Response Authentication Mechanism), x.509 certificates, LDAP (Lightweight Directory Access Protocol), and Kerberos.
Example:
To enable SCRAM-SHA-256 authentication, you need to start the MongoDB server with the --auth option.
mongod --auth --port 27017 --dbpath /data/db
Authorization
Authorization determines what actions a user or service can perform on the database. MongoDB uses role-based access control (RBAC) to manage permissions.
Example:
To create a user with read-only access to a database:
					db.createUser({
   user: "readUser",
   pwd: "password123",
   roles: [{ role: "read", db: "exampleDB" }]
})
Encryption
Encryption ensures that data is protected both at rest and in transit. MongoDB supports various encryption methods, including TLS/SSL for data in transit and encrypted storage engines for data at rest.
Example:
To enable TLS/SSL:
- Generate SSL certificates.
- Configure MongoDB to use SSL by adding the following to the
mongod.conffile:
					net:
   ssl:
      mode: requireSSL
      PEMKeyFile: /path/to/mongodb.pem
      CAFile: /path/to/ca.pem
Setting Up Authentication
Creating Users
Creating users with appropriate roles is essential for securing your MongoDB deployment.
Example:
To create an admin user:
					db.createUser({
   user: "admin",
   pwd: "securePassword",
   roles: [{ role: "userAdminAnyDatabase", db: "admin" }]
})
Explanation:
- user: Username.
- pwd: Password.
- roles: Assigns roles to the user. In this case,
userAdminAnyDatabaseallows the user to manage users on any database.
Enabling Authentication
To enable authentication, add the security section to your mongod.conf file:
					security:
   authorization: enabled
Role-Based Access Control (RBAC)
Built-In Roles
MongoDB provides several built-in roles to manage permissions easily.
Example:
read: Grants read-only access to a specific database.readWrite: Grants read and write access to a specific database.dbAdmin: Provides administrative rights to a specific database.
Custom Roles
You can create custom roles to fine-tune permissions.
Example:
To create a custom role:
					db.createRole({
   role: "customRole",
   privileges: [
      { resource: { db: "exampleDB", collection: "" }, actions: ["find", "update"] }
   ],
   roles: []
})
Explanation:
- role: Name of the custom role.
- privileges: Defines the resources and actions the role can perform.
- roles: Inherits permissions from other roles.
Network Security
Enabling TLS/SSL
To secure communication between clients and the MongoDB server, enable TLS/SSL.
Example:
- Generate certificates.
- Configure MongoDB to use TLS/SSL by adding the following to the
mongod.conffile:
					net:
   ssl:
      mode: requireSSL
      PEMKeyFile: /path/to/mongodb.pem
      CAFile: /path/to/ca.pem
Firewall Configuration
Use firewalls to restrict access to your MongoDB server.
Example:
To allow access only from specific IP addresses, configure your firewall rules accordingly:
sudo ufw allow from 192.168.1.100 to any port 27017
IP Whitelisting
MongoDB can be configured to allow connections only from specific IP addresses.
Example:
In the mongod.conf file, set the bindIp option:
					net:
   bindIp: 127.0.0.1,192.168.1.100
Data Encryption
Encryption at Rest
MongoDB offers encryption at rest using the WiredTiger storage engine.
Example:
To enable encryption at rest, add the following to your mongod.conf file:
					security:
    enableEncryption: true
    encryptionKeyFile: /path/to/encryptionKey
Client-Side Field Level Encryption
Client-Side Field Level Encryption (CSFLE) allows you to encrypt specific fields in your documents.
Example:
Using the MongoDB driver, enable CSFLE:
					const { MongoClient, ClientEncryption } = require('mongodb');

const client = new MongoClient("mongodb://localhost:27017", {
   useNewUrlParser: true,
   useUnifiedTopology: true
});

const encryption = new ClientEncryption(client, {
   keyVaultNamespace: 'encryption.__keyVault',
   kmsProviders: {
      local: {
         key: Buffer.from('your_master_key_here', 'base64')
      }
   }
});

const encryptedClient = new MongoClient("mongodb://localhost:27017", {
   useNewUrlParser: true,
   useUnifiedTopology: true,
   autoEncryption: {
      keyVaultNamespace: 'encryption.__keyVault',
      kmsProviders: {
         local: {
            key: Buffer.from('your_master_key_here', 'base64')
         }
      },
      schemaMap: {
         'test.encrypted': {
            bsonType: 'object',
            properties: {
               ssn: {
                  encrypt: {
                     bsonType: 'string',
                     algorithm: 'AEAD_AES_256_CBC_HMAC_SHA_512-Deterministic'
                  }
               }
            }
         }
      }
   }
});

async function run() {
   await client.connect();
   await encryptedClient.connect();

   const collection = encryptedClient.db('test').collection('encrypted');
   await collection.insertOne({ name: 'Alice', ssn: '123-45-6789' });

   const doc = await collection.findOne({ name: 'Alice' });
   console.log(doc);

   await client.close();
   await encryptedClient.close();
}

run().catch(console.error);
Explanation:
- ClientEncryption: Sets up client-side encryption.
- autoEncryption: Automatically encrypts and decrypts fields based on the schema map.
- insertOne: Inserts an encrypted document.
- findOne: Retrieves and decrypts the document.
Auditing and Monitoring
Enabling Auditing
MongoDB provides auditing capabilities to track database activity.
Example:
To enable auditing, add the following to your mongod.conf file:
					auditLog:
   destination: file
   format: JSON
   path: /var/log/mongodb/audit.log
Monitoring Tools
Use monitoring tools like MongoDB Atlas, Ops Manager, or third-party solutions to track database performance and security.
Example:
To enable monitoring with MongoDB Atlas:
- Sign up for a MongoDB Atlas account.
- Deploy a cluster.
- Use the Atlas dashboard to monitor your database.

Securing your MongoDB deployment is crucial for protecting your data from unauthorized access and ensuring data integrity. By understanding and implementing authentication, authorization, encryption, network security, and auditing, you can create a robust security framework for your MongoDB database. This chapter provides a comprehensive guide to MongoDB security, equipping you with the knowledge and tools to secure your MongoDB deployment effectively.Happy coding !❤️
