Managing GitHub Branches
Managing branches in GitHub is a core skill for effective collaboration and organization in software development. This chapter will guide you through the process of managing GitHub branches, starting from the basics and advancing to more complex scenarios.
Understanding Branches
A branch in Git is like a parallel version of your project. It allows you to work on new features or fixes without affecting the main project (usually the main or master branch). Once your work is complete, you can merge it back into the main branch.
Why Use Branches?
- Isolate Work: Keep new features or bug fixes separate from the main codebase.
- Collaboration: Allow multiple developers to work on different parts of the project simultaneously.
- Experimentation: Test new ideas without risking the stability of the main project.
Basic Branch Operations
Step 1: Creating a Branch
- Open your terminal or command prompt.
- Navigate to your project folder.
- Use the command:bash
git branch new-branch-name
Example
git branch featurev1

Step 2: Switch to the newly created branch using:
git checkout new-branch-name
Example
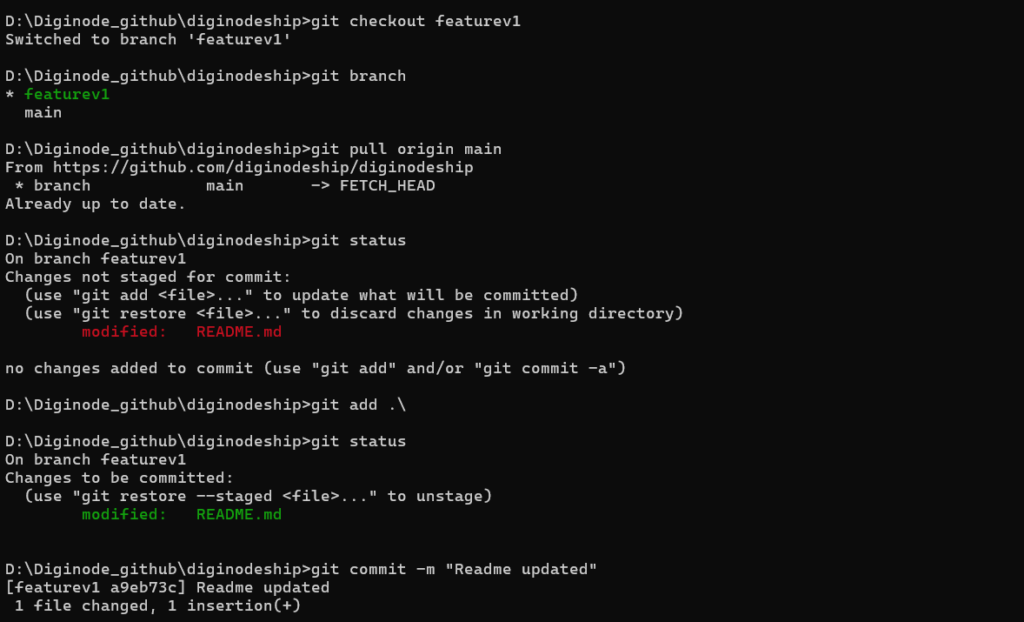
git checkout featurev1

Step 3: You can combine the branch creation and switching steps into one using:
git checkout -b new-branch-name
Example
git checkout -b featurev1
This will create the new branch and switch to it in one step.
Switching Between Branches (Basic)
Once you have multiple branches in your repository, you may need to switch between them as you work on different tasks.
Step 1: To switch to another branch, use the following command:
git checkout branch-name
Example
git checkout main
Note: If you’re working on something and have uncommitted changes, Git will not let you switch branches until you either commit, stash, or discard your changes.
Pushing a Branch to GitHub (Basic)
After switching to the branch, make your changes:
- Edit files in the repository.
- Add and commit the changes:bash
					git add .
git commit -m "description"
Push the Branch to GitHub:
git push -u origin feature-login
Once you’ve created and made changes on your branch locally, you need to push it to GitHub to make it available for others.
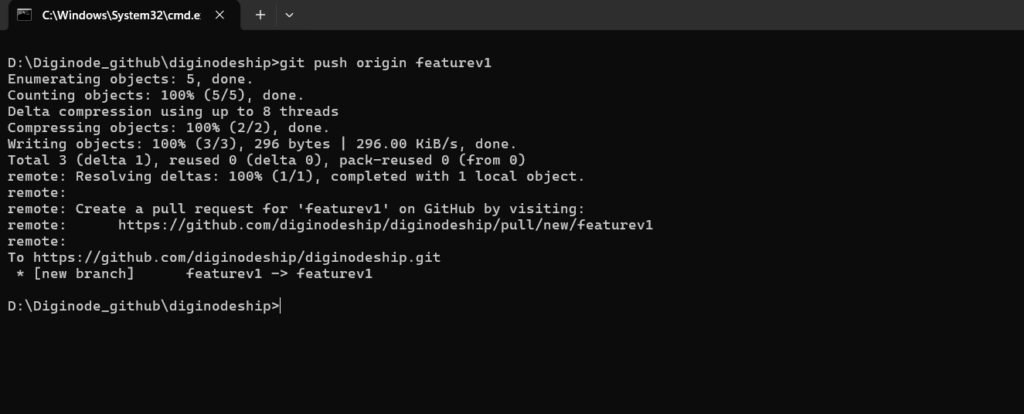
Step 1: Push your branch to GitHub using:
git push origin new-branch-name
Example:

git push origin featurev1

Step 2: After pushing, your branch will appear on GitHub under the “Branches” tab of your repository.

Deleting a Branch (Basic)
Once you’ve completed work on a branch (or it’s no longer needed), it’s a good idea to delete it to keep your repository clean.
Step 1: To delete a local branch, use:
git branch -d branch-name
Example
git branch -d featurev1
Step 2: To delete a branch from GitHub (remote), use:
git push origin --delete branch-name
Example
git push origin --delete featurev1
Merging Branches (Basic)
When you’ve finished working on a branch, you typically want to merge it back into the main branch (or another branch).
Step 1: Switch to the branch you want to merge your changes into (usually
main):
git checkout main
Step 2: Merge the changes from the other branch:
git merge featurev1

Step 3: Resolve any conflicts if they appear. Git will mark files with conflicts, and you will need to edit them manually to resolve the differences.
Step 4: After resolving conflicts, stage the changes:
git add .
Step 5: Commit the merge (if necessary):
git commit -m "Merged featurev1 into main"
Step 6: Push the changes to GitHub:
git push origin main
Using Pull Requests on GitHub
A pull request is a way to propose changes and discuss them before merging:
- Push your branch to GitHub.
- Go to the repository on GitHub.
- Click Pull Requests > New Pull Request.
- Select the base branch (e.g.,
main) and compare it with your feature branch. - Add a description and click Create Pull Request.
- After approval, merge the pull request.

Advanced Techniques
Rebasing: Rebase your branch to update it with the latest changes from main:
					git checkout feature-login
git rebase main
Squashing Commits: Combine multiple commits into one:
git rebase -i HEAD~3
Tips for Effective Branch Management
- Use descriptive branch names (e.g.,
feature-login,bugfix-issue123). - Regularly merge
maininto your feature branch to stay updated. - Delete merged branches to avoid clutter.
Managing GitHub branches is vital for collaborative and organized development. By creating branches for features or bug fixes, you can work independently without disrupting others. Tools like pull requests and techniques like rebasing ensure smooth integration and cleaner histories. Mastering branch management will make your workflow more efficient and your project easier to maintain. Happy coding !❤️
