Pushing Branches to GitHub
In the chapter titled "Pushing Branches to GitHub," we will walk through the process of pushing a local branch to GitHub so that others can see and collaborate on it. This is an essential part of using Git for version control in team projects. Below is the detailed explanation with examples.
What is Pulling Branches to GitHub?
Before we get into the steps, it’s important to understand what “pulling a branch to GitHub” means. When you create a branch in your local Git repository, you can push it to GitHub to share with others. The term “pulling” might be a bit misleading here, as it’s actually about “pushing” your local branch to GitHub.
Prerequisites
Before we start, ensure that:
- You have a GitHub account.
- You have a repository on GitHub where you want to push your branch.
- Git is installed on your system.
- You have a local Git repository initialized and connected to the remote GitHub repository.
Steps to Push a Branch to GitHub
Step 1: Create and Switch to a New Branch Locally
If you haven’t created a branch yet, you can do so using the following commands:
git checkout -b <branch-name>
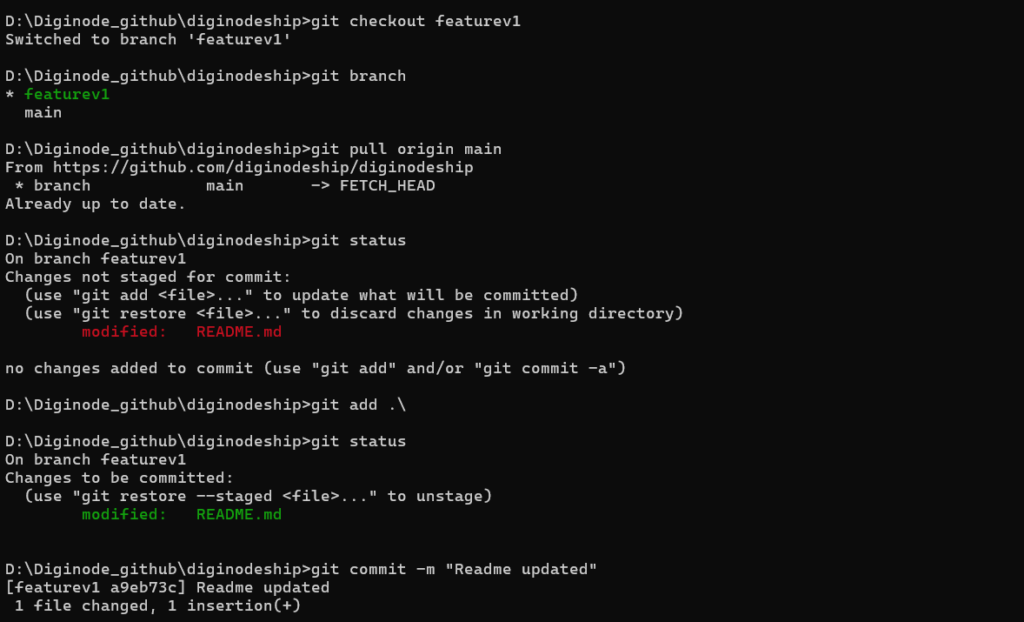
For example, if you want to create a new branch called featurev1, run:
git checkout -b featurev1
This will create a new branch and switch you to it.
Step 2: Make Changes and Commit Them
After switching to your branch, make the necessary changes to your files. Once done, stage and commit your changes using the following commands:
					git add .
git commit -m "Description of changes"
Example

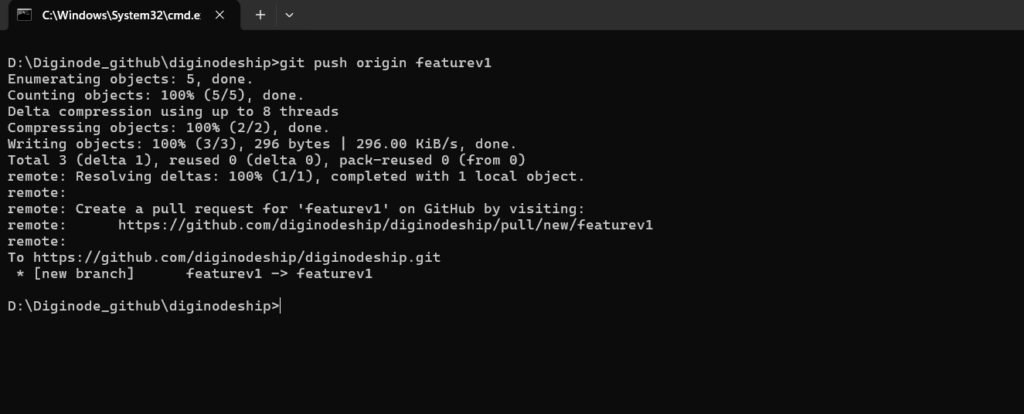
Step 2: Push the Branch to GitHub
Once your branch has the changes you want, it’s time to push it to GitHub. Use the following command:

Step 3: Switch to the branch you want to pull
To switch to another branch (let’s say featurev1), use:
					// Syntax
git pull origin <branch-name>
git pull origin featurev1
Step 4: Switch to a new branch
To switch to another branch (let’s say featurev1), use:
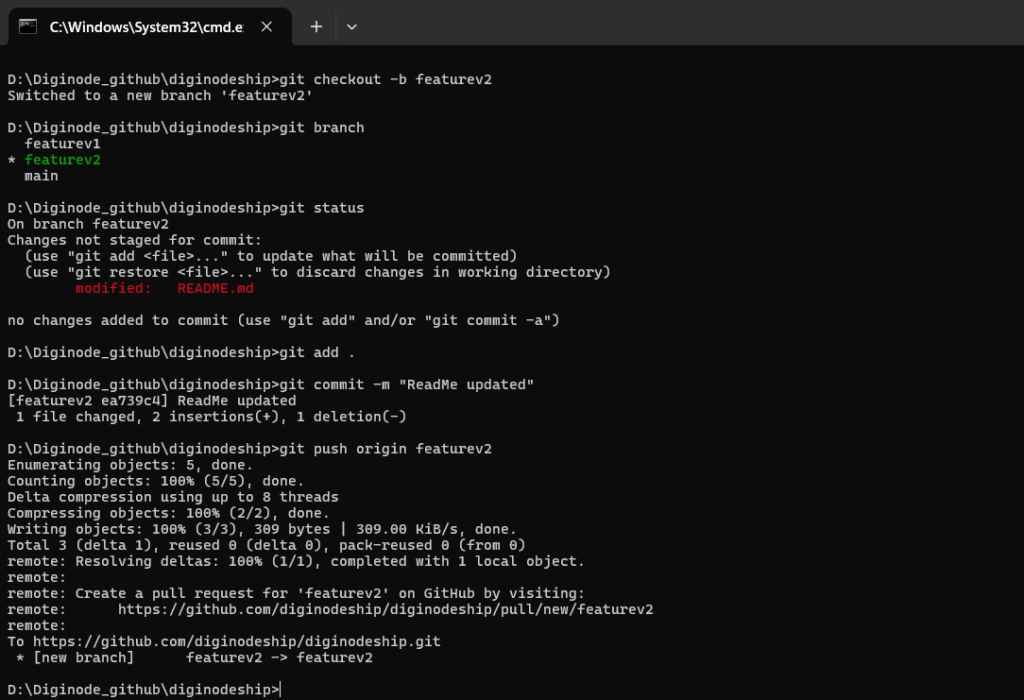
git checkout -b featurev2
follow below steps to push this branch.

git push origin featurev2
This command pushes the featurev2 branch from your local repository to the remote GitHub repository.
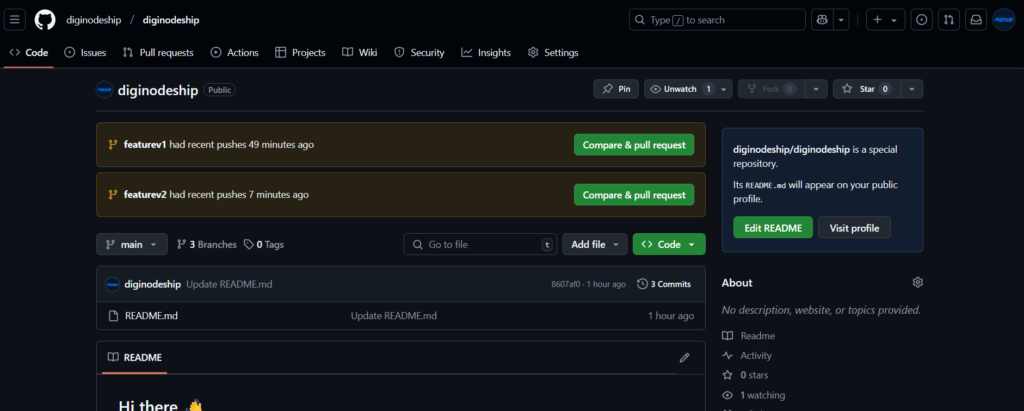
Step 5: Verify the Branch on GitHub
After pushing the branch, go to your GitHub repository in the browser. You should see the new branch listed under the “branches” section. You can also create a Pull Request (PR) from GitHub to merge your changes into the main branch or any other branch.

Step 6: Collaborating with Others
Once your branch is on GitHub, other team members can check it out and collaborate with you. To pull the branch on their local machines, they can use:
Pulling branches to GitHub means pushing a branch from your local repository to GitHub. This allows you to share your work and collaborate with others. By following the simple steps above, you can easily push your local branches to GitHub and begin collaborating on different features with your team. This process is vital for version control and ensuring that everyone has access to the latest changes. Happy coding !❤️
