Development Environment
TypeScript, a superset of JavaScript, extends the language with static typing, enhancing code reliability and developer experience. To effectively utilize TypeScript, you'll need to establish a development environment that supports its features. This chapter will guide you through this process, from the fundamentals to advanced considerations.
Installing Node.js and npm
Before setting up TypeScript, ensure you have Node.js and npm (Node Package Manager) installed on your system. Follow these steps:
Download Node.js: Visit the official Node.js website (https://nodejs.org/) and download the installer for your operating system.
Install Node.js: Run the downloaded installer and follow the on-screen instructions to install Node.js.
Verify Installation: Open a terminal or command prompt and run the following commands to verify that Node.js and npm are installed:
					node -v
npm -v
You should see the versions of Node.js and npm printed in the terminal.
Code Editor or IDE Selection
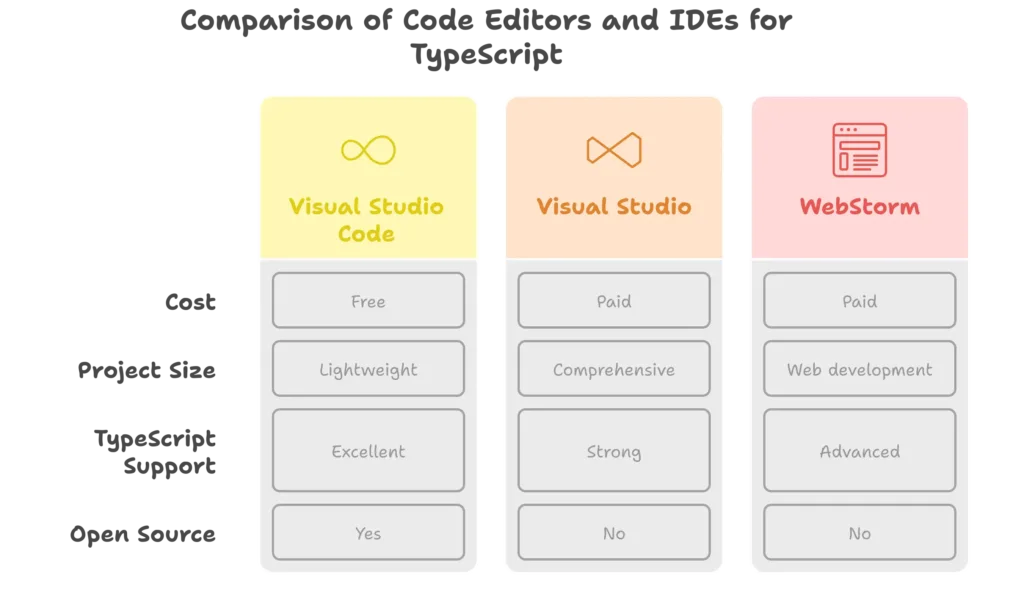
A good code editor or Integrated Development Environment (IDE) improves your TypeScript development experience. Popular options include:
- Visual Studio Code: A free, open-source, and lightweight editor with excellent built-in TypeScript support.
- Visual Studio: A comprehensive IDE from Microsoft, ideal for larger or enterprise-level projects, with strong TypeScript integration.
- WebStorm: A commercial IDE by JetBrains, catering specifically to web development and offering advanced features like code navigation, debugging, and refactoring for TypeScript.

Creating a Project Directory
Once Node.js and npm are installed, create a new directory for your TypeScript project:
					mkdir my-typescript-project
cd my-typescript-project
Initializing a TypeScript Project
Next, initialize a new npm project within your project directory:
npm init -y
This command creates a package.json file with default values.
Installing TypeScript
Now, let’s install TypeScript as a development dependency in your project:
npm install typescript --save-dev
or you also install typescript globally then there is no need to install type script again and again when you work on different projects.
npm install -g typescript
This command installs TypeScript and adds it to the devDependencies section of your package.json file.
What are developer dependencies ?
Developer dependencies, often abbreviated as devDependencies, are a specific category of packages used during the development process of a project but not included in the final production version. They provide essential tools and libraries for tasks like:
- Testing: Frameworks like Jest or Mocha help you write unit tests to ensure your code functions as expected.
- Linting: Tools like ESLint analyze your code for style and potential errors, improving code quality.
- Building: Build tools like Webpack or Gulp automate tasks such as compiling TypeScript to JavaScript, bundling code with dependencies, and minifying for production.
- Code Coverage: Libraries like Istanbul measure how much of your code is covered by tests, ensuring thorough testing.
- Development Servers: Tools like live-server or webpack-dev-server can create a local development server to preview your application as you make changes.
Key Points:
- Installation: You typically install devDependencies using commands like
npm install <package-name> --save-dev(with npm) oryarn add --dev <package-name>(with yarn). These flags indicate that the packages are for development only. - Location: DevDependencies are stored in the
node_modulesdirectory within your project, but they are not included when you deploy your application to a production server. - Benefits: Using devDependencies helps keep your production code clean, reduces its size, and improves performance. It also ensures that developers have the necessary tools for efficient development without cluttering the final product.
Example:
Imagine you’re building a web application with TypeScript. Here’s a breakdown of dependencies you might encounter:
- Dependencies: These would be libraries your application directly uses to function, such as React or a UI framework. They would be included in the production build.
- DevDependencies: These might include Jest for testing, ESLint for linting, and TypeScript itself for development-time compilation. They wouldn’t be part of the deployed application.
Configuring TypeScript
Create a tsconfig.json file in your project directory to configure TypeScript settings
					{
  "compilerOptions": {
    "target": "es5",
    "module": "commonjs",
    "outDir": "dist",
    "strict": true
  },
  "include": ["src/**/*"]
}
Here’s what each option does:
"target": Specifies the ECMAScript target version. We’ve set it to"es5"to ensure compatibility with older browsers."module": Specifies the module system. We’re using"commonjs"for Node.js compatibility."outDir": Specifies the output directory for compiled JavaScript files."strict": Enables strict type-checking options."include": Specifies the files to include in compilation. We’re including all TypeScript files within thesrcdirectory.
Writing TypeScript Code
Create a src directory within your project directory, and add a TypeScript file, for example, index.ts:
					// index.ts
const message: string = "Hello, TypeScript!";
console.log(message);
Compiling TypeScript Code
Compile your TypeScript code to JavaScript using the TypeScript compiler (tsc):
tsc index.ts
or
npx tsc
This command compiles all TypeScript files within the src directory according to the settings specified in tsconfig.json and outputs the compiled JavaScript files to the dist directory.
Running the Compiled Code
Now that your TypeScript code is compiled to JavaScript, you can run it using Node.js:
node dist/index.js
You should see the output "Hello, TypeScript!" printed in the terminal.
Congratulations! You've successfully set up a TypeScript environment from scratch. You now have everything you need to start building TypeScript applications, from basic setup to advanced configurations. Happy coding! ❤️
